

For a few, this must seem so weird. We all know that car with these amount of power are equipped with big brakes, ABS, and a million computers to make the car stop easier.
But, in cases when some people want more, companies like Wilwood or other companies produces even beter brakes. That’s aftermarket!
So, below we’re going to explain you to step by step how to install the WIlwood Big-Brake Kit on a C7 Corvette.
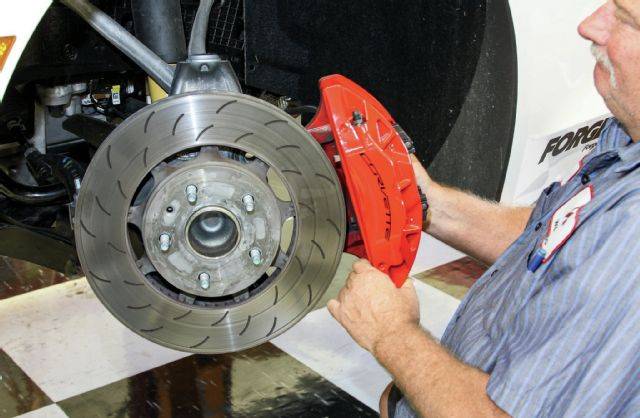
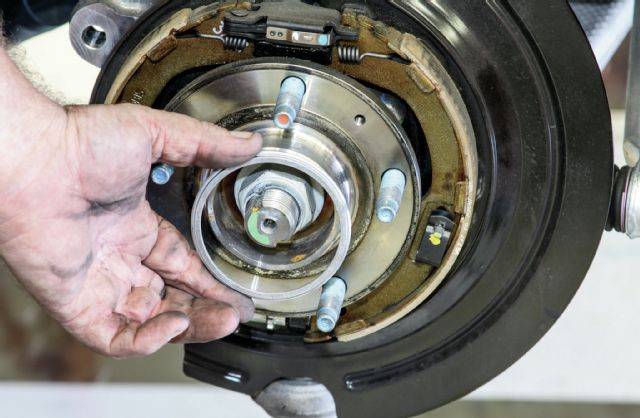
1. Unbolt the OE caliber, leaving the brake line attached, and set it on top of the spindle. This way we didn’t have to worry about brake fluid leaking everywhere while we were installing the rest of the parts.
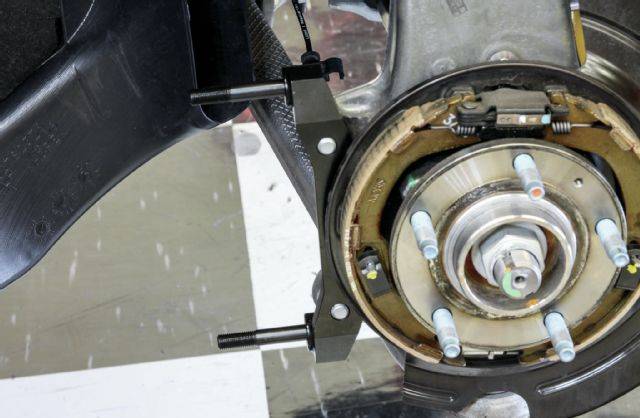
2. In the second part we’re about to install the bracket for the radial-mount caliper. Per the instructions, we initially installed two 0.029-inch thick shims on each of the two bolts between the bracket and Corvette upright.
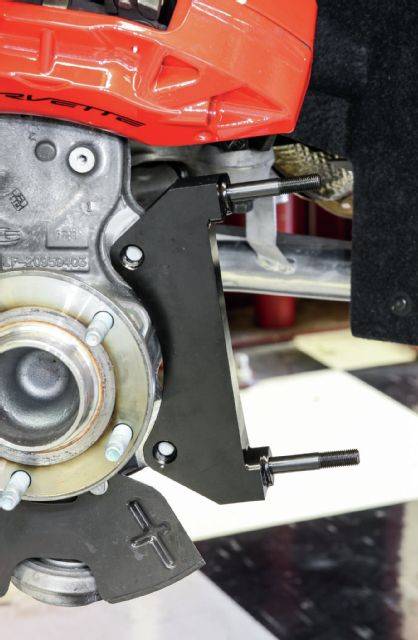
3. Part 3: then we temporarily attached the bracket, making sure it was square to, and properly seated against, the upright bosses. After confirming caliper alignment, we went back and added Loctite 271 before torquing the two bolts down to 77 ft-lb or 104nM.
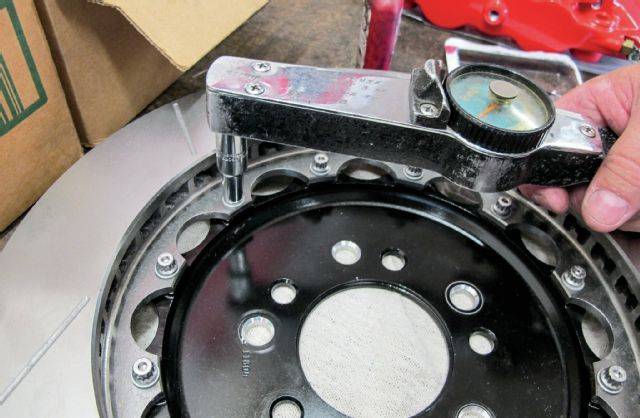
4. Now it’s time to mate the hats to the rotors. The two parts were aligned and we hand inserted the 12-point fasteners, each with a dab of red Loctite 271, in the holes. Using a star pattern, we tightened each to 155 in-lb or 17nM. If you want extra security you can safety wire the fasteners using 0.032-inch stainless wire.
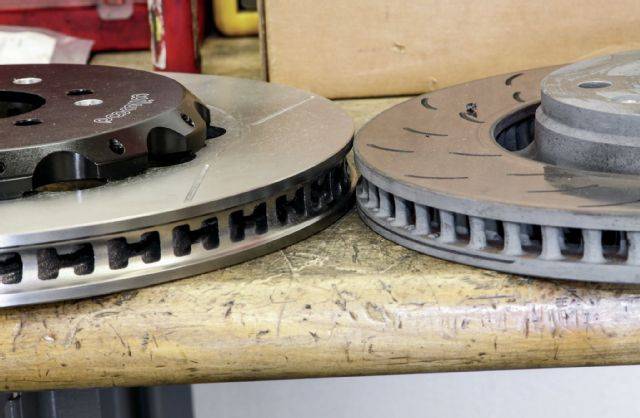
5. The 14.25-inch diameter Spec 37 GT slotted and staggered-vane rotor (left), sitting next to the stock OE rotor, is 1.25-inches thick and all that mass is what you need in a performance rotor. The SRP version of this kit comes with drilled, slotted, and E-coated rotors, but it’s not recommended for heavy track use.
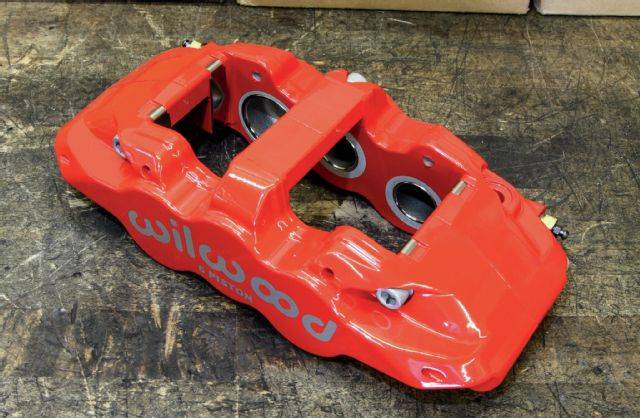
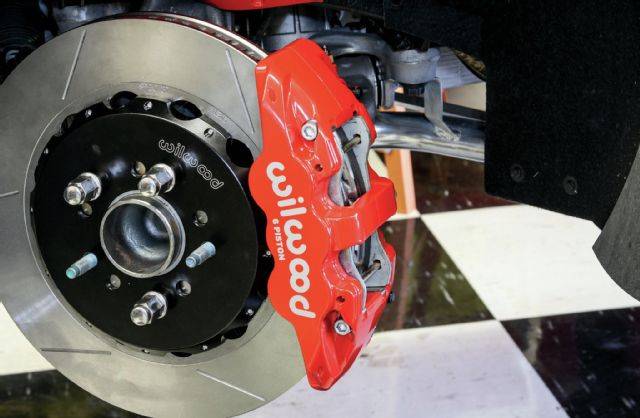
6. This kit also utilizes Wilwood’s new AERO6 six-piston caliper. They are 15-percent more rigid than their predecessors while weighing 0.5 pounds/0.2kg less (almost 4 pounds/1.8kg lighter than the OE Z51 calipers). A significant achievement considering how much effort went into their previous caliper. Notice the lack of a bridge bolt. This is one aspect that contributed to the added stiffness.
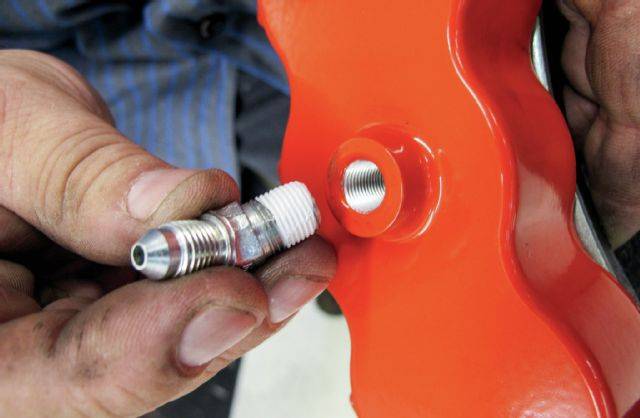
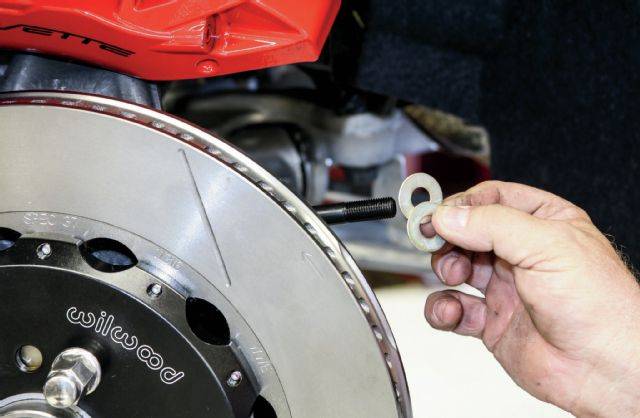
7. The OE rubber brake lines weren’t compatible with the Wilwood calipers so we installed these fittings (included in the kit) into the 1/8-27 NPT caliper inlets.
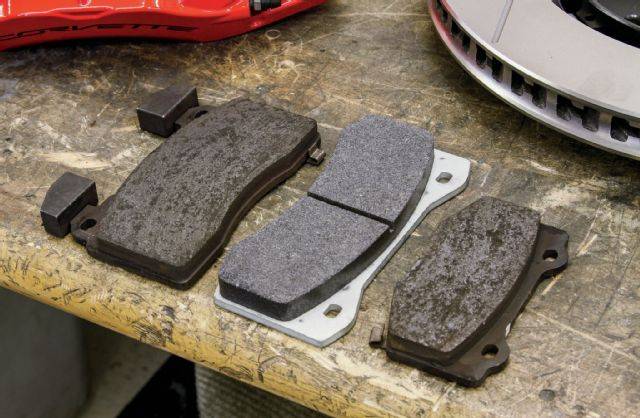
8. Here you can see the OE brake pad to the far left, the Wilwood BP-20 (street/track) Smart Pad in the center, and a rear pad to
the far right. The front and rear Wilwood kits use the same size/type
pad. The SRP kit includes Wilwood’s BP-10 street pad.
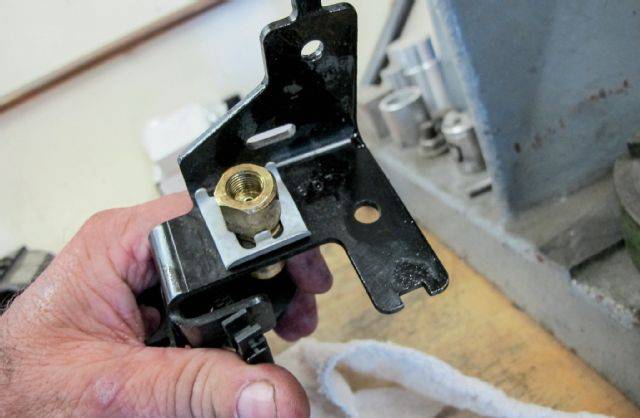
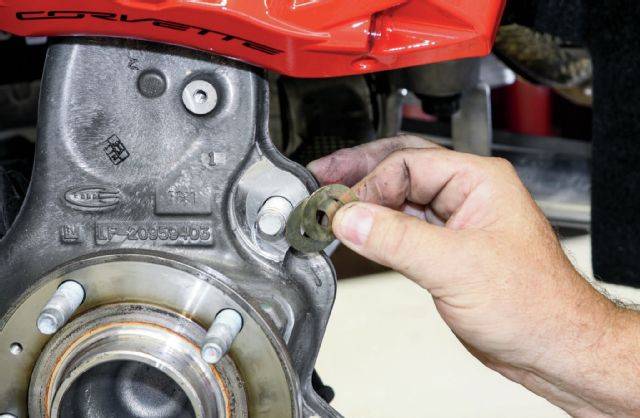
9. The hardest part of this install was removing this OE bracket that held the brake line. It just required patience and some
contortion to remove.
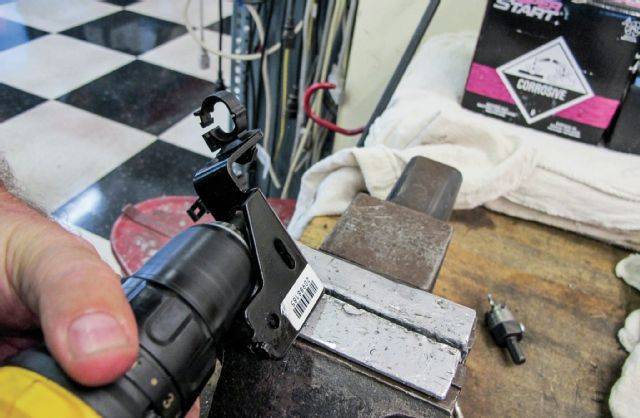
10. It also needed to be modified by opening up the hole to 0.500-inch diameter using a hand drill.
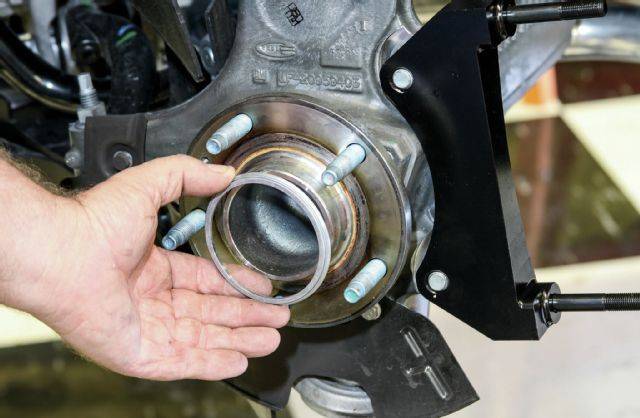
11. We then slid the registration adapter over the hub with the small side facing outward.
12. This allowed us to install the rotor/hat assembly and temporarily hold it in place with some lug nuts.
13. After lubricating the caliper mounting studs with some lightweight oil, we initially placed two 0.030-inch thick shims on each stud. The caliper was then mounted (keeping in mind there is a right and left caliper) without pads to check alignment. We made sure the rotor was centered in the caliper, which it was. If it wasn’t we would have added or subtracted bracket shims as needed. Make sure you always use the same amount of shims on each mounting bolt.
14. The caliper was aligned properly so we installed the BP-20 pads by popping out the retaining clips and sliding out the pins. We then slid in the pads and reinstalled the pins and clips. With that done we could slide the caliper onto the radial mount studs. At this time we checked to make sure the top the brake pad was flush with the outside diameter of the rotor. It was, but if it wasn’t we would have pulled the caliper and added or subtracted shims to change the caliper height. The caliper nuts were then torqued to 47 ft-lb.
15. With the caliper in place we removed the OE caliper and installed our new DOT-approved stainless brake line. We also made sure the line wouldn’t rub any components.
16. Now let’s move to the rear of the C7. Like the Wilwood front kit, the rear system is offered in two flavors: SRP for the street and
GT for the street and track. We’re not going to bore you with how the
remove the rear caliper and rotor.
17. Just like the front, we first installed the registration adapter over the hub.
18. Installing the caliper mounting bracket was just like the front except we used one 0.033-inch/0.8mm thick shim between the bracket and the upright. The bolts were just snugged until we confirmed caliper alignment. Later they will be coated in Loctite 271 and torqued to 77 ft-lb/104 nM.
19. The rear rotor in either the SRP or GT kit will measure out at 14.25 inches in diameter and 1.10 inches in thickness.
They feature the same super-efficient, staggered vane design for optimal cooling.

20. The caliper alignment procedures used on the front system were then repeated for the rear. With everything checked we installed the BP-20 Smart Pads and slid the four-piston AERO6 caliper into place.
21. Like the fronts, we had to use the new braided stainless lines (PN 220-9101) in the kit and ditch the rubber OE pieces.
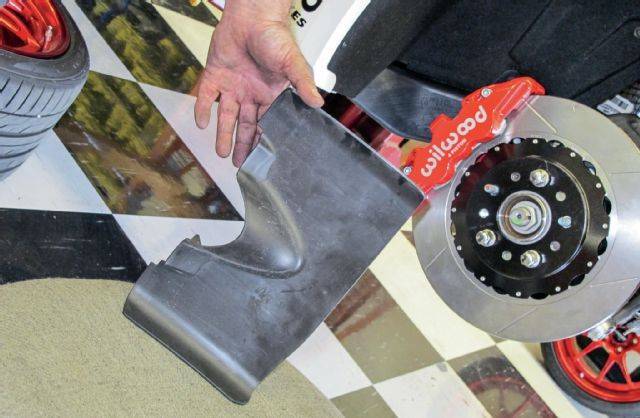
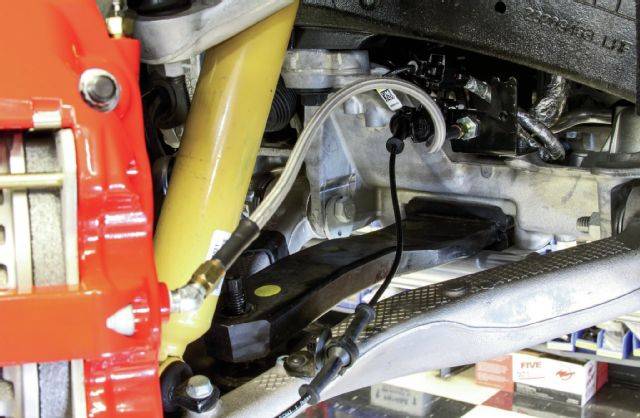
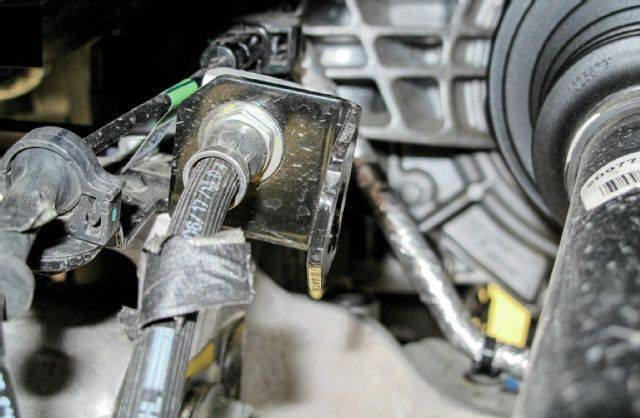
22. Per the instructions we modified the plastic brake ducting to allow clearance for the new braided brake line. Here you can see the before…
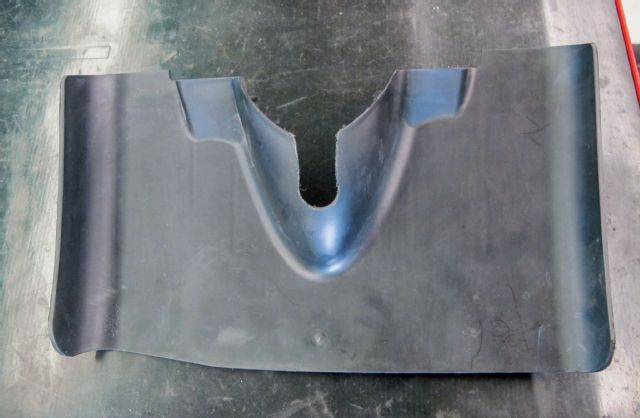
23. so…

24. Here you can see how the line will route through the modified brake duct panel.

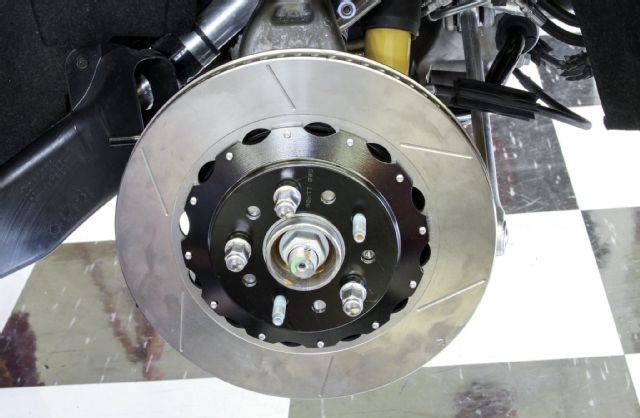
25. And just like that we were done with the installation and could then bleed the system using Wilwood’s high-temp fluid.
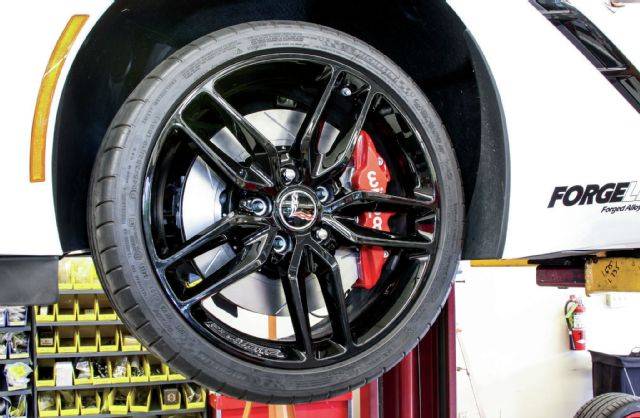
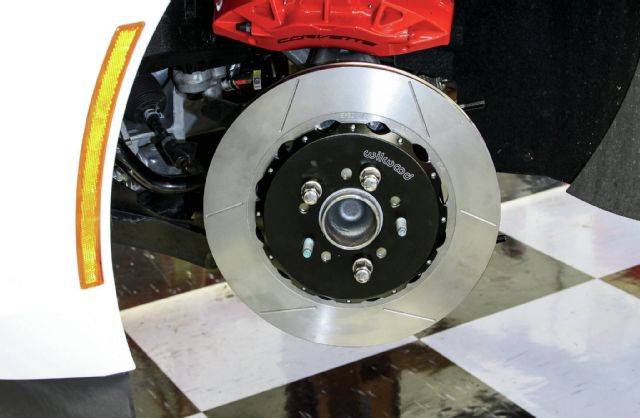
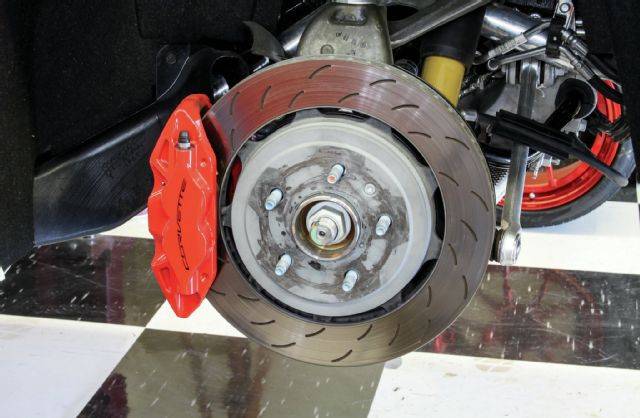
26. We knew the Forgeline wheels would clear the bigger brakes, but we wanted to make sure stock rollers would be good to go as well. The new brakes look killer behind the wheels and we can’t wait to bed them in and hit the track!
27. Enjoy!
Leave a Reply
You must be logged in to post a comment.